Sunday, October 25, 2009

Celtic Whiskey Apples Recipe

Based on a very old recipe for Golden Apples, this sweet treat is like having only the best parts of apple pie.


You'll need:

1 Apple

1 Rolled, refrigerated pie crust

1/2 cup Jim Beam whiskey

1 cup Sugar

1/4 t Cinnamon

1/4 t Dried Orange Peel

A dash of Ground Clove


- Start by coring an apple and cutting into 16 even wedges

- Set aside the apple pieces for later use

- Unroll the pie crust and cut into circles using a drinking glass

- Roll out each circle a little before placing a wedge of apple along one side

- Fold the pie crust circle over the wedge of apple and smooth over using your fingers to encase the apple wedge

- Repeat this for each apple wedge

- Arrange the wrapped apple wedges onto the bottom of an ungreased 9X9 casserole dish


- In a sauce pan, dissolve 1 cup sugar into 1/2 cup of Jim Beam whiskey on low-medium heat

- When the sugar has dissolved, stir in your spices

- Pour the warm whiskey syrup over the wrapped apple wedges

- Bake at 400F for 20 minutes

- Allow to cool a bit and serve warm

Lavender Honey Sweet Rolls

A favorite from a few months ago I thought I would share.
Here it is at last.

Combine the following:

2c Whole wheat flour
1c All purpose flour
2 packets of Dry active yeast
2t Salt
1/2t Baking soda

*Heat the following in a saucepan over low heat:
1 1/2c Plain Yogurt
1/2c Water
3T Butter
1/2c Lavender infused honey

(Heat to about 125 F)

*Pour the mix from the saucepan over the dry ingredients

*Mix well (use a mixer if needed)

On a floured surface, knead in the following:
1c Whole Wheat flour

*Once kneaded, place the dough into a greased bowl and allow to rise until it
has about doubled in size.

*Punch the dough down and push out into a rectangle

*Using a pizza cutter, divide the dough into 1 inch by 6 inch sections

*Take one section and curl it over two of your fingers. The dough is fairly
stretchy so it should curl up nicely.

*Slide the roll off of your finger and onto a greased baking sheet.

*Reapeat that process with each section of dough until all of your rolls are
complete.

*Cover the rolls and allow them to rise for a 1/2 hour

*Bake on the middle or upper rack at 350F for 10-12 minutes. Keep a close eye on
these because the bottoms love to burn.

*Spray the top of each roll with cooking spray and set onto a wire rack to cool.

*Serve the rolls with lavender honey butter or rose petal jam.


In case you don't know how to infuse honey...
Heat a cup or two of honey on low until it is easy to stir. Add in a few sprigs
of fresh lavender or a tablespoon or two of dry lavender. Maintain a low heat
for a few minutes until the smell of the flowers is strong. Strain the lavender
out and jar the honey for later use.

Thursday, June 11, 2009

Cool Down with a Mango Lassi Recipe

M is for Mango Lassi by ilovelalalu

Mmm... One of my favorite drinks of all time has to be the Mango Lassi. It's an Indian smoothie that's absolutely delicious. It's just the right amount of sweet and cold to cool me down on a balmy, hot night like tonight. Here's a simple recipe for my frozen Mango Lassi.

-----------------
INGREDIENTS
-----------------
1/2 cup Skim Milk
1 cup Stonyfield Farms French Vanilla Yogurt
10 -15 Ice Cubes
1 cup Frozen Mango Chunks (1 1/2 if you really like mango)
2 T Agave Nectar
1/4 t Nutmeg

---------------
DIRECTIONS
---------------
1. Place milk, yogurt, ice and mango chunks into the blender
2. Mix on Puree setting until smooth
3. Pour on agave nectar
4. Sprinkle on nutmeg
5. Blend for a few more seconds
6. Pour some into a glass
7. Enjoy

Since I'm in a Mango Lassi mood, here are some awesome related items on Etsy:

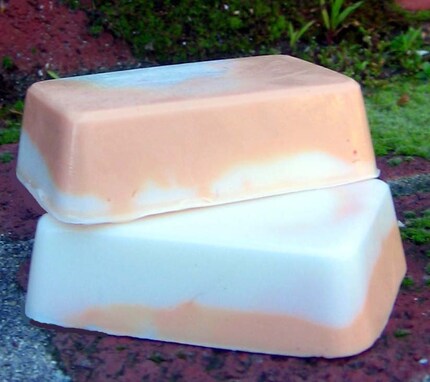
Mango Lassi Soap by BathAlchemy

This soap looks very yummy. In fact this seller has a number of fun and colorful soaps in her shop. Her Midnight Jasmine soap looks amazing too!

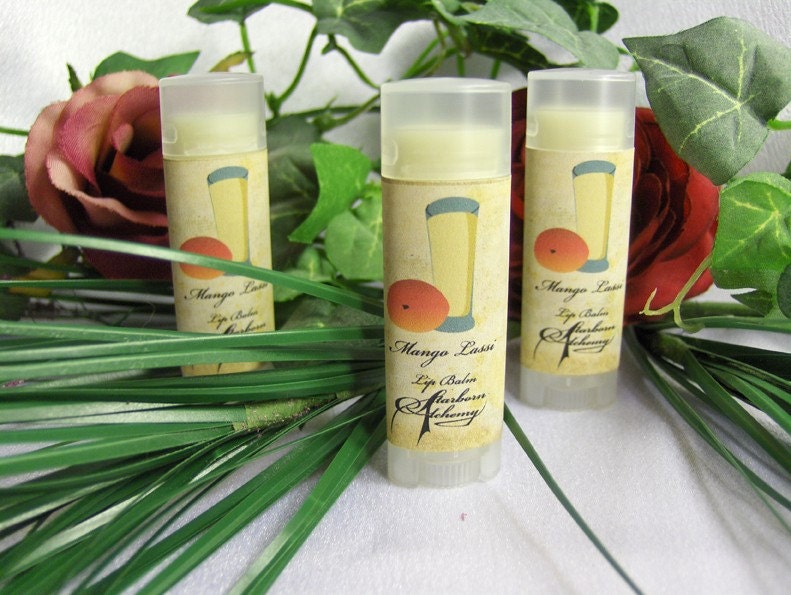
Mango Lassi Lip Balm by StarbornAlchemy

For all of those times when you aren't near a blender, this lip balm can act as a surrogate lassi. According to the description, not only does it smell of Mango Lassi but it's also sweet! Yum.

Wednesday, May 27, 2009

Cooling Muscle Salve - Visual Recipe

Sore, hot muscles are inevitable as the days get warmer and activity increases. This recipe is intended to help soothe just those aches and pains. Think of it like a cooling version of tiger balm.

This recipe is simple, but does require quite a few essential oils. Having tested it on my own sore knees after a long day, I can say that it feels utterly refreshing and smells uplifting too!

--------
TOOLS
--------
Candle warming plate
Small ceramic mug
Measuring spoons
Stirring stick
Measuring cup
Empty 2oz jar with lid
-----------------
INGREDIENTS
-----------------
1 oz Jojoba Oil
1 oz Sweet Almond Oil
1 1/2 t Beeswax
30 drops Peppermint Essential Oil
20 drops Camphor Essential Oil
15 drops Eucalyptus Essential Oil
10 drops Lavender Essential Oil
3-5 drops Lemongrass Essential Oil (optional)

Note: The lemongrass can be overpowering. It smells fresh and citrusy, but if you prefer a cool mint smell I would encourage you to not include it in the salve.

------------------
INSTRUCTIONS
------------------
Turn on the candle warmer
Place mug on the warmer
Add jojoba and sweet almond oil to the mug

Add the beeswax and stir
Allow the beeswax to melt completely into the oil

Cover with foil to speed the process

When fully melted, add in the essential oils
Stir to evenly distribute

Pour the salve mix into a jar
Allow to cool at room temperature until hard
Store in the refrigerator for extra cooling action!

Tuesday, May 26, 2009

Yarrow Healing Salve - Visual Recipe

Today's recipe is for a simple Yarrow Salve. Yarrow, a.k.a. Achillea Millefolium, has been praised for centuries in western culture as a great healing herb. Traditionally Yarrow was used to treat wounds due to it's styptic properties. It's colloquial nickname of "nosebleed" reflects one of it's common uses.

Here I will cover step by step a method for making a Yarrow Salve. The nice thing about this recipe is that it does not take much in the way of supplies and can be prepared in a small space.

---------
TOOLS
---------
Candle warming plate
Small ceramic mug
Measuring spoons
Stirring stick
Measuring cup
Cheesecloth
Small mesh strainer
Empty 2oz jar with lid
-----------------
INGREDIENTS
-----------------
1 oz Jojoba Oil
1 oz Olive Oil
3-4 Yarrow Leaves
3-4 T Yarrow Flowers
1 1/2 t Beeswax
5 drops Vitamin E Oil

------------------
INSTRUCTIONS
------------------
Turn on the candle warmer
Place mug on the warmer
Add jojoba and olive oil to the mug

Add yarrow leaves into mug
Break apart if needed

Add yarrow flowers to mug
(Fresh, white flowers are best, but dry will do)
Make sure the yarrow is mixed well
The oil should just cover the yarrow

Allow yarrow bits to sit in the warm oil for up to 2 hours

Strain through cheese cloth into a cup

Bundle up excess the cheesecloth around the yarrow and press the bundle against a mesh strainer to squeeze out the last of the oil.

Be VERY CAREFUL, the oil is HOT.
Hot oil hurts, a lot.

Transfer the oil back into the ceramic mug

Warm the oil up again

Shave off the beeswax needed for the next step

Add in the beeswax and stir

Allow the beeswax to melt completely into the oil
This is your salve mix

Warm up a glass jar under water of increasing temperature
Wipe the jar dry
Transfer the warm salve mix into the jar
Allow to cool at room temperature

Voila! Yarrow Salve!

Thursday, May 14, 2009

Peppermint Lip Balm - Visual Recipe

I've been wanting to post this for a while, but my personal life has been a big distraction lately. Not that I mind, but it also feels good to get another recipe up. This one is very simple and requires only little bits of ingredients. It will make just about one tube of lip balm.

---------
TOOLS
---------
Set of measuring spoons
Stirring stick
Candle warmer
Ceramic mug
Empty lip balm tube

-----------------
INGREDIENTS
-----------------
1/2 tsp White Beeswax
1/2 tsp Cocoa Butter
1/2 tsp Sweet Almond Oil
3 drops Peppermint EO

-----------------
DIRECTIONS
-----------------
Heat up the candle warming plate.
Place beeswax into little ceramic mug.

Add sweet almond oil to little mug.

Place mug atop the candle warming plate.
Melt the wax and oil.

Shave cocoa butter into the mug.
Stir to distribute.

Add in 3 drops of peppermint essential oil.
Stir.
It should smell beautifully minty now!

Continue to melt into a uniform liquid.

Make sure the pusher is at the bottom of the tube.
Pour the warm liquid into the empty lip balm tube.
Set aside to cool.
Refrigeration speeds the cooling process.

TA-DA... some super cheap, very fab lip balm.

Thursday, May 7, 2009

Thanks to Visitors Worldwide - 10 Weeks

After 10 weeks of keeping Majhada full of fun recipes, tutorials and interesting bits of inspiration I feel I should thank all of the visitors for their support!

THANKS SO MUCH!

Thus far I've had visitors from the following places: United States, Australia, Malaysia, Germany, South Africa, Brazil, Bangladesh, Canada, United Kingdom, Malawi, Italy, Croatia, Philippines, Netherlands, France, Reunion, Slovakia, Hungary, Pakistan, Malaysia, Mexico and Dominican Republic.

I hope to post a thank you to visitors from many more countries in the months to come.

Keep coming back. :-D

Wednesday, April 29, 2009

Tidbits from Southern Region War Practice

Since I have decided not to attend Pennsic this year, I felt the need to sate my appetite for a decently long SCAdian event. While not to the scale of the big war, the Southern Region War Practice plus EKU was a nice local event. There was much to be had in the way of weapons practice, but I decided to not bring my bow in favor of taking it easy for the weekend.

Fighters out on the field.

The site turned out to be rather nice. I was able to stay in the lodge with showers, which was pleasant minus the snake that found it's way into my belongings! Thanks to one of my lodge mates and his son, I never had to encounter the scary little fellow. I am much appreciative of that.

The meals at the event were hearty thanks to the hardworking cooks of the Shire of Owlsherst. While I don't have pictures of the feast, I did have the chance to enjoy it and ended up having rather friendly company during the meal.

Though still early for a lot a blooming plants, these little ones were popping up all over the woods. They created little pops of color throughout the site. I didn't want to pluck one, but I did consider transplating a few to my own backyard. I eventually settled for just a picture.

To be quite honest I really decided to go to the event mainly for the East Kingdom University classes. I ended up having the chance to learn how to spin wool properly, tried my hand at making glass beads, learned a bit about blackwork embroidery, fell in love with viking wire weaving and had the chance to sing with some very welcoming folks.

My second attempt at wire weaving still on the dowel

The finished wire weaving piece (and my not-so-period pants)

Djembe Repair - Roping & Tuning (Visual Tutorial)

The last in my series of Djembe repair posts involves the roping and tuning of the drum after having placed a new head. Again, my post really acts as a supplement to the instructions for roping and tuning found at Hawk Dancing. I am happy with the results.

----------
ROPING (not the Gyptian type)
----------
I used a section of Dacron rope wrapped around three times and secured with a slipknot for my base "hoop". If you chose to do this, make sure you can fit two fingers comfortably between the ropes and the drum body. This will ensure there is enough room for stringing the verticals.

Next I strung the verticals using another long section of Dacron rope. You are dealing with a lot of rope during this process, make sure it doesn't knot into itself. I worked from the top hoop down and back up again all of the way around the drum. I found it very helpful to sting "anchor ropes" between the bottom and top hoops to keep the head even while I worked my way around with the verticals. These anchors were made using sections of the old rope then removed and tossed aside as I was ready to string new rope in each section.

While stringing the verticals, the head begins to pull down a little and you may get some gathers around the skin hoop. I simply pulled the skin to smooth these out as I saw them.

After stringing the veticles by hand the top of the drum looked like this.

Using a thick wooden dowel, I tightened each vertical section with as much force as I could muster. There are other rope pulling tools for drums available if you want to make this easier on yourself. Since this was a fairly small drum, hand pulling worked decently enough.

----------
TUNING
----------

I will try to explain the easiest way I have found to create tuning diamonds on a Djembe.

Start by drawing the end of your rope under two vertical ropes. Will we call them A and B. They look something like this.

Next, using one hand, pull A over B and draw the end of the rope up between them.

You can now pull the rope through to create one section of tuning. It looks like this once the rope is pulled taunt. If it doesn't look like this, try again. You will get into a rhythm of making these as you work around the drum.

When you reach the end, you will be confronted by the last vertical which consisted of a one rope A and a two rope B. Treat this just as you have when making tuning diamonds before. Draw the end of the rope under A and B. Pull A over B and then guide the end of the rope through.

Finish the rope down to the base hoop in the way that makes most sense to you, yet is still pliable enough to re-tune later if you need to.

-------------
FINISHING
-------------
I wanted to create a more substantial handle that my drum had before. In order to do this I used a size 15 crotchet needle and just worked a very simple single chain stitch.

It's basically done by making a loop under the head of the needle as a starting point then repeating this: wrap a new loop under the head, lift the old loop over the head.

After a while, it looks like this. It makes a sturdy strap for carrying the drum.

When all of the roping and tuning if finished, pull the goat skin down over the head and wrap with a bandage overnight. Leave it somewhere where it won't be disturbed.

The next morning, remove the bandage. Your drum head will look something like this.

Simply trim off the excess skin from the head and you are left with a rather handsome drum. From what I understand, once you have completely re-headed your drum you will need to play it for about a week and add a tuning diamond or two if needed.

Thursday, April 23, 2009

Making a Set of Celtic Ogham Staves

Today I felt inspired to make a set of Ogham staves. I did some research about these over the past few days and wanted to try to make a set on my own. I created my set from the natural shed of four great trees nearby. It took a while to find appropriately sized pieces and to trim them to vaguely similar lengths. I'm happy that the trees were able to share some fine pieces.


From there I used a knife to carve open areas in which to inscribe each Ogham letter. While I did this, my cat explored around me and acted nasty when I finally decided she must go inside. Once back indoors I used a pencil to place the a letter on each stave with a dot at the bottom to indicate which side goes down. Finally, I went over my pencil inscriptions with a wood burning tool. They ended up looking pretty sexy.

Some handsome staves indeed!

Tonight I will do something special to get them ready for use. In order to get some practice with these, I have offered free Ogham readings on Etsy. Actually, I will post some of the basic information from that listing on here just for educational reasons. Here it is:

What is the Ogham?

The Ogham refers to the ancient Celtic Druidic alphabet. Each letter stave corresponds with one of the 20 sacred trees. Here, the Ogham is used to seek wisdom concerning a certain topic.

How does it work?

The questioner holds in their mind a question that they are seeking guidance about while the reader calls upon the wisdom of the Divine, the Land and the Ancestors. The reader then casts the staves. The placement of the staves and their symbols indicate a message for the questioner.

p.s. I swear I will wrap up my Djembe repair posts soon. They have been pretty popular lately.